I wanted to break in my new Kitchen aid stand mixer by making a cake or cupcake. Ever since I read The domestic goddess by N.Lawson, I have been in a cupcake trance. I keep yearning for another blogging event that focuses on these little ones. I decided to ease my heartache with light but cute cupcakes. Fannie Farmer's baking book had a hot milk sponge cake (this is the base for Boston cream pie) recipe that was interesting. The resultant cupcake was spongy, not dry, sweet and tasty. No separating egg whites, no double boiler, no soaking with syrup, nothing. With just 2 eggs and 1 tbsp butter, who would have thought such ethereal fluffiness can be achieved.
Hot milk sponge drops- 12
1/2 cup milk
1 tablespoon unsalted butter
1 cup sifted cake flour
1 teaspoon baking powder
1/2 teaspoon salt
2 eggs
3/4 cup superfine sugar
1 teaspoon vanilla extract
Position rack in the lower third of the oven and preheat to 350 degrees F (175 degrees C). Butter muffin tins or place liners in them. In a small saucepan, heat the milk and butter to almost boiling. Set aside.
Sift together the flour, baking powder, and salt four times. Set aside.
Beat the eggs on medium-high speed in an electric mixer fitted with beaters or a whip attachment for about 2 minutes. Gradually add the sugar, 1 tablespoon at a time, taking about 4-5 minutes to blend it in well. Scrape the sides of the bowl occasionally. The mixture will thicken and turn light yellow in color. Reduce mixer speed to medium.
Add the vanilla, then pour in the hot milk IN A STEADY STREAM, taking about 10 seconds. Immediately add the dry ingredients all at once, and beat just until blended, scraping the sides of the bowl as necessary. Increase mixer speed to medium-high and beat 10 seconds.
Remove the bowl from the mixer and quickly pour the batter into the prepared pan.
Bake about 15 min, or until the cupcake is golden brown and springy to the touch.
Set on a cake rack to cool for about 10 minutes.
Run a thin knife around the sides of the pan to loosen cupcakes. Reemove and cool completely on racks.
The cupcakes did not rise as much to produce the domed top effect. So I call them sponge drops (what's in a name, huh?). I covered it up with some brown sugar frosting that was quite butterscotchy. I also dipped a couple in homemade hot fudge sauce to fix my chocolate cravings.
Friday, May 27, 2005
Thursday, May 26, 2005
Appam, aebleskiver or kanom krok
On one of the foodie sites, I came across this discussion about a Danish pancake ball called Aebleskiver. They are made in a cast iron pan that resembles a muffin tin that looks like this
Looking at this pan, surprisingly led me to this discovery. The pan is nothing but an appam or paniyaram mold that is used in South India to make similar fritters. Here is mine:
Some research revealed other interesting insights. Kanom Krok is a Thai version of appam. It is made similarly with rice flour and coconut but it has a filling of some sort. I just happen to feel that these dough balls originated in Thailand and traveled to South India. I am wondering if there is a version of this in Sri Lanka too since all these parts have a lot of similarity in climate and religious beliefs.
I find all this study of how foods evolved really thought provoking since they also represent change in government and religion that happened around that period. May be the corrupted, westernized versions of South Asian foods we are served at restaurants will evolve into legitimate dishes with their unique identities. I wonder if anyone still knows the stories behind ethnic dishes like aebleskiver, kanom krok or appam.
Cookbook meme
Yippee, Jennifer of Taste everything once has made me the next in line for playing the Cookbook meme 2005. I do not have a lot to display for you folks but here you go:
Collection in kitchen
collection in study, right
collection in study, left
1. Rationale behind what we're seeing?
I would like to think there is a rationale but there is none. Its all here 'coz there is no place elsewhere for these to be. A lot of it has been gathered at library book sales. Many are vegetarian books. I recently got old, battered copies of The joy of cooking and Larousse Gastronomique from a library sale. Waiting to try the right recipe from the two well-known books. But my most used recipes are in word documents, note pads and magazine clippings.
notes
2. Most recommended?
Oh there are several. I love the Fannie Farmer cookbook for thoroughness, Nigella's books for writing and Alice Medrich's books for her authoritarian voice. I also love The sandwich book by Nancy Silverton- recipes are long-winded but worth it.
3. Cookbook that made you what you are?
I am relatively new to cooking but the food shows on TV particularly Caprial's cafe and From Martha's kitchen got me started. At one point, every thing I cooked was from the Food network website. Now I get my kick by reading cookbooks than by watching them on TV. Probably I have read more cookbooks than made stuff in the kitchen.
4. Porniest cookbook?
Martha Stewart's Hors d'Oeuvres handbook, Mai Pam's Pleasures of the Vietnamese Table, Nigella's Domestic Goddess. I have read most of Thai and Vietnamese cookbooks and I love the food and people pics.
5. My Choice cookbook?
Its funny, but I don't have any. I always turn to the Internet- a google search, Epicurious or my favorite Recipezaar. If I am clueless of what to cook I make Indian recipes just as my mom would make. I recently bought 1000 Indian recipes by Neelam Batra and it is something I use very often to make north Indian dishes. I highly recommend it.
6. If you were a cookbook, which cookbook would you be?
This is really easy. It would have to be two books actually- Flatbreads and flavors and The turmeric trail. Both of them are good writings about the eating experience, food in a social and regional context rather than being recipe-focused. I loved the Turmeric trail 'coz it brings back a lot of memories of growing up in a South Indian household. Truly a cultural experience...
7. If your cookbook were extremely valuable, so valuable you might hide it with other valuables, where would that place be?
I would scan all my valuable books onto a word doc and store it in a CD. More valuable are the hand-written recipes copied from various sources, collected over a few years. I have to find a place now to hide them but I doubt if anyone else would find them valuable.
I am tagging Nicole of Baking sheet. Nicole, I wonder where you get all your delicious looking recipes from?
Wednesday, May 25, 2005
American Idol 2005- is it over so soon?
I am unabashedly a fan of Idol. I know, it is difficult to like anything on Fox but this is a show I do not miss. Mostly to hear the vicious comments of Simon Cowell (also for his English good looks). Something about these English blokes is really charming- be it Hugh Grant, Sting or even the effeminate Rupert Everett. These days I watch Idol for Bo Bice, his cute wink and smile. I love rock and it feels refreshing to see a rock anthem being performed on stage rather hearing it on a CD. After seeing last night's finale, I feel Carrie has a good chance of becoming this year's idol. She just might win this time. Hoping against hope and rooting for Bo to win...
Saturday, May 21, 2005
World in a Pancake- Adai or Sprouted mung bean pancakes
Pancake is sort of a westernized name for this South Indian breakfast/snack food. 'Adai' as it is called in Tamil Nadu, consists of rice, various lentils and beans ground with red or green chilies, cilantro, coconut, black pepper into a coarse mass. This is then spread thickly onto cast-iron griddles and cooked until reddish brown. This one is a healthier, fiber- and protein-rich recipe since it calls for sprouted lentils and mung bean. Our Indian vegetarian diet seemingly relies too much on empty carbohydartes while badly lacking in proteins. This recipe is one of the few exceptions- it is very filling without relying too much on carbohydrates like rice. You may have to start the sprouts 2-3 days before you want to make this.
I used a type of lentil called horsegram - no, it has no relationship to horses. The small brown French lentils will work well too. Mung beans were the second component. Both of these were soaked overnight separately, drained and sprouted.
Adai (serves 4-6)
1 cup Brown lentil sprouts
1 cup mung bean sprouts (I don't think the Chinese bean sprouts would work for this recipe)
1 inch ginger, peeled and chopped
3 serrano chilies or 3 dried red chilies
1/2 cup scallions, chopped (even shallots or onions will do)
1/2 cup spinach or other greens, finely minced (optional- add if you want more nutrition)
2 Tbsp cilantro, finely minced (optional)
1 tsp salt or more to taste
Grind sprouts with ginger and chilies into a coarse, thick batter.
Mix in salt, scallions, greens and cilantro.
Spread a ladleful of batter, thickly on a medium hot griddle. Add a tsp of oil around the pancake.
You do not need to make the hole in the middle. I do this 'coz my mom does it. Cook for about a minute on each side. The adai should be a rich, reddish brown. Serve hot with raita or coconut chutney. It is also great with my childhood favorite side-dish of ghee-sugar mixture (that is if you don't mind the calories).
IMBB # 15- Getting jiggy with gelatin- Mango Charlotte
This IMBB event hosted by charming Elise of Simply recipes could have been a disaster. I do not like jiggly, jelled foods much and I was contemplating a no-show for this one.. until I came across this recipe (and also remembered the need to use up a couple of dozens of ladyfingers). I have always looked at charlottes with awe- it is not something that you see at parties. I have never eaten one. When Pierre Herme made a more authentic version in Martha Stewart's Food network show, I wondered open-mouthed, about how the ladyfingers stuck together and made a picket fence surrounding the pool of cherry Bavarian. This is an elegant dessert from the 1800s; an ice-box, no-bake cake of the high society, if you will.
The hard part was getting the ladyfingers fit into my springform pan and also to get the vertical fingers stand stable on curved base. This is where my geekiness steps in. The geek in me asks me to bake a biscuit base from 'The Cake bible' that would act as my faux base. The ploy worked great too. Some mango nectar from the Indian grocer was the moistening agent for sticking the fingers together. This lightened up version sure is delicious 'coz mango and yogurt go very well together with cardamom brightening things up.
Mango Charlotte (from Bon Appetit-May 1994)
1/2 c Mango nectar plus more for gluing ladyfingers
1/4 oz Unflavored gelatin
1 1/2 cup mango puree (made from about 2 cups ripe mangoes)
3 tb Sugar
2 tb lemon juice
1 1/3 c Plain low-fat yogurt
1/2 tsp ground cardamom
1/2 cup diced peeled mangoes
About 18 Sponge cake ladyfingers
One Biscuit base, cut to fit your pan
finely chopped unsalted pistachios for garnish
Place nectar in small saucepan. Sprinkle gelatin over. Let stand 10 minutes to soften gelatin. Stir over low heat until gelatin dissolves. Remove from heat. Stir in nectar mixture, sugar, cardamom and lemon juice to the mango puree. Place bowl over large bowl filled with ice water. Stir mango mixture occasionally until cold and beginning to mound, about 10 minutes. Fold in yogurt and 1/2 cup diced mangoes. Chill over ice water 5 minutes longer, stirring occasionally.
Place the biscuit base and brush with 4 tablespoons of mango nectar. Arrange enough ladyfingers and stand around the perimeter of base, using nectar as a glue to stick fingers, keeping their rounded sides out. Spoon mango mixture into pan. Cover with plastic wrap; chill until set, at least 5 hours.
I used some mango slices and pistachios for garnish. The effect it had on our friends was worth all this effort. Tastes great too.
Friday, May 20, 2005
SHF #8- Key lime curd
This SHF is being hosted by Alice at My adventures in the breadbox and the citrus theme is so great with the markets overflowing with this fruit family. But the significance of seasonality in USA is almost non-existent since there is not really a season for anything nowadays. Thanks to the large grocery chain stores with their global suppliers, citrus fruits are available ALL the time, whether they taste good or not. The small, emerald beauties, Key limes are not in this list of all-season citrus fruits. At least not where I live. Key limes are available around April and May. I took the inspiration for lime curd from Nigella Lawson's 'How to be a domestic goddess'. The photograph's yellow glow was really appealing. I have been resistant towards the idea of lemon curd, mainly 'coz I thought it would taste eggy and uncooked. But no, the resultant custardy goo is really tasty and tart.
I used the recipe of my favorite pastry chef Gale Gand, of the Food network fame to make the Key Lime curd. To showcase the curd, I made her recipe for Lemon cream daisies, something that I have been eyeing for a long time. It is so simple but yet so elegant.
Scones have been the classic pairing for lemon curd. This recipe for British scones, has been raved on several recipe sites. So to taste the classic combination for the first time, I made the scones too including some poppy seeds to make it yummier. Wow, I had lot of fun working with ya, Key lime!
Thursday, May 19, 2005
Ummm, Giardiniera
Since I came across this Italian pickled veggies, I have been hooked. I am a sucker for hot stuff and it is a pick-me up treat that goes with my everday sandwich lunch. It is low fat too. I pick them by ladlefuls and devour them like a pregnant lady. I love the huge pieces of cauliflower and carrots, the most. I do not like the pepperoncini though. These can be a part of your antipasti platter. Rachel Ray also makes a muffuletta sandwich with it. Unfortunately, these two options with meat wouldn't work for me. Any vegetarian uses for it?
Monday, May 16, 2005
Herbal escapades with mint- Mint pulao
I find mint too pungent for any recipe. But my mom added this recipe for mint pulao to her repertoire two years back and since then, she has been raving about it and she makes this almost once a week for my choosy (read spoilt) brother's lunch box. My mom adds more mint and less cilantro to make the pesto-like chutney. But for our taste, I add equal quantities of both. This is very refreshing. Cooking the chutney with rice removes the overwhelming woodiness of the mint and also infuses the herbs into the rice. Use ghee or clarified butter to smooth out the herbs.
Make a paste of 1/3 cup each cilantro and mint with 3 green chilies. Mix chutney with enough water in a measuring cup to make 2 cups of liquid. Heat ghee or oil in a pan and add mustard seeds. When they splutter, add the chutney water and 1.5 tsp of salt. When the water starts boiling, mix in 1 cup of long-grain or basmati or brown rice. Reduce heat to a simmer and cover pan with a tight fitting lid. Cook until rice is done according to your preference. Serve with raita.
Saturday, May 14, 2005
Clean your fridge Tofu with black bean sauce
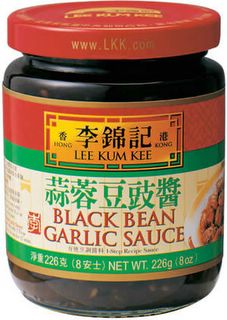
I have got myself a subscription to Cooking Light and this is the first recipe I tried from the May 2005 issue. It was really a sort of clean your fridge endeavor last night. And all the veggies I had were adaptable to Chinese cooking. This requires Asian black bean paste, a salty, delicious pungent paste. I have the Lee Kum Kee brand and find it really good. I also toss up some with soba noodles for a quick lunch.
Here is the adapted recipe:
2 blocks of tofu, pressed, drained and cubed
1 tbsp minced peeled ginger
1 tbsp minced garlic
4 dried chilis
10 cremini mushrooms, sliced
1 red pepper, sliced thin (I used green 'coz thats what I had)
1 tbsp black bean paste
1 tbsp soy sauce
2 tbsp sherry (I used rice wine)
1/3 cup minced scallions
1 tsp sesame oil
Oil
Method is simple stir-fying. Heat oil and add garlic, chilies and ginger and saute for 30 sec. Add pepper and mushrooms and stir-fry 2-3 minutes until slightly tender. Stir in tofu and sherry; cook 3 min or so till sherry evaporates. Stir in scallions. Remove from heat and add the soy sauce, bean paste and sesame oil. Serve with steamed or fried rice.
Thursday, May 12, 2005
A delicious light supper to go
What, a watermelon salad! You must be kidding... This was my initial reaction to Nigella's recipe in Forever Summer. With its photogenic nature, this salad once proved a savior for a bland, watery melon. Here is my encore of this delicious recipe. It is a great marinated salad and works well for a picnic at the park.
This will be accompanied by a light pasta, chock full of basil and fava beans. I have been frequenting the farmers' market since April, mainly in search of these green beauties. The dried ones you find at Middle Eastern stores are not good enough. You have to seize this bounty before favas are out of season.
Pasta with fava and basil - adapted from Bon Appétit
2 cups shelled fresh fava beans
1 cup coarsely chopped fresh basil
2 large garlic cloves, chopped
3 Tablespoon olive oil
2 tablespoons fresh lemon juice
Handful of fettuccine
4 Tablespoon freshly grated pecorino Romano cheese
Cook beans in large pot of boiling salted water until crisp-tender, about 3 minutes. Using slotted spoon, transfer beans to large bowl. Reserve water in pot.
Combine 1 cup beans, 1/2 cup chopped basil and garlic in processor. Using on/off turns, process until beans are coarsely chopped. Transfer mixture to bowl with whole beans. Add remaining 1/2 cup basil, olive oil and fresh lemon juice. Stir to blend. Season bean mixture to taste with salt and pepper.
Meanwhile, cook pasta in same pot of boiling salted water until tender but still firm to bite. Drain pasta, reserving 1 cup cooking liquid. Return pasta to pot.
Stir 1/4 cup reserved cooking liquid into bean mixture. Add to pasta. Add grated pecorino Romano cheese and enough remaining cooking liquid to moisten. Season pasta to taste with salt and pepper and serve.
Now off we go to eat under the stars.
Monday, May 09, 2005
Long cooked broccoli tartines
One of my favorite cookbooks is The Sandwich book by Nancy Silverton. Wow, the recipes and the photos are amazing. When I came across her book, I got so excited that I made two of her recipes, back to back. Her recipes for tian and a baked ricotta sandwich were really over the top delicious. Her recipe for long cooked broccoli was deliciously well-written and I have been waiting to try this for quite a while. Broccoli, is one of the most under-used vegetables for us. Lets face it, its woefully under or over-cooked in salad bars and pasta. Only stir-fries seem to do justice to this good-for-you veggie. Ms. Silverton's recipe may not be the best way to cook it. But it is probably the tastiest, what with so much EVOO and garlic.
Here is the recipe, if you are interested.
The only problem with her recipes is she takes the texture variation thing too seriously, making assembling a tiring chore by itself. When you have this delicious, oily broccoli, why would you want to go overboard with scrambled eggs? Her toppings are good enough to eat on their own. That's the problem when you make them for parties. If you are able to serve her open-faced sammies for parties, then you are self-less and self-disciplined enough not to eat the toppings by yourself. Kudos to you!
Wednesday, May 04, 2005
Moroccan tagine with couscous
Tagine refers to slow-cooked meat and veggies as well as the cooking dish- a clay pot with a conical lid. Most recipes that I found were with lamb and had lotsa spices, raisins, olives and even preserved lemon. I do not have the tagine. But luckily for me, I had Trader Joe's tagine sauce and so I got on with the cheater's version. Being a vegetarian most of the time, lamb or chicken got a thumbs down. The vegetarian version is primarily made of chickpeas. What could be easier than heating chickpeas with the sauce? The tagine is really tasty unlike the usual sub-standard store-bought sauces. There is a certain je ne sais quoi about this sauce that makes it great but I don't know what contributes to the taste.
I served this on some good quality couscous prepared Greek style with bits of chopped up tomatoes, dried oregano, feta, mint, some toasted pistachios, with a lemon sauce tying it all together. Mmmm!!!
Tuesday, May 03, 2005
Lemon rasam with carrot salad
Rasam is a sort of thinned down lentil broth, spiked with tamarind and/or tomatoes or lemon juice, that is served over rice in South india. In the USA, it is even served in restaurants as an appetizer/soup. It is spicy, tangy and soothing all at once and each sip seems to burst with surprises. Lemon rasam is tangier and tastes of fresh lime, chiles and ginger and its like sunshine in a bowl.
A handful of pigeon peas, cooked until mushy
1 lime or 1/2 lemon
1 tomato, coarsely chopped
1/2 tsp ground turmeric
2-3 serrano chiles, chopped as desired (if you do not like it very spicy, leave it as large pieces)
Salt as needed
1 inch ginger, peeled and finely chopped
1/2 tsp mustard seeds
Oil or ghee- 1/2 tsp
dry red chili- optional
Cilantro, few sprigs, finely chopped (optional)
Thin down the pigeon peas until it is really thin broth-like. Add the tomato pieces, salt, turmeric and green chiles. Boil until you see foam on top for about 5 minutes. Heat oil or ghee in a pan. Add the mustard seeds and dry chile and let them splutter. After this, quickly add the ginger and saute for like 15 seconds. Add this seasoning to the hot broth. Let rasam cool down to lukewarm. Squeeze lime/lemon and mix. Taste after you squeeze each half. Garnish with cilantro. The tanginess is really upto you. If you want to serve this 2-3 hours later, let it be slightly less tangy than desired 'coz the flavor brightens up after sitting. But please people, do not boil this rasam again for reheating. The lemon gets real bitter!! Serve as soup or with a little rice added.
Now for my mom's marinated carrot salad. I hate carrots for savory dishes but this is something I can gorge on by the bowlfuls. It is once again, as you guessed, SPICYYY! I don't think this is actually south indian but it is mighty tasty. Just grate 3 medium peeled carrots in the big holes of your box grater. I reckon the carrot matchsticks sold readily prepped, can be used. Season the carrots with oil in which the following have been spluttered: 1/2 tsp mustard seeds, 1/2 tsp urad dal and 2 coarsely chopped serrano chillies. Mix in salt to the carrots. Now squeeze 1/2 a lime or lemon over and let the salad marinate for at least an hour before serving.
Guava pinwheels
If you have an old slab of guava paste, sitting in your fridge, this is a real easy (but slightly temperamental) recipe to try. This is from Moosewood restaurant's book of desserts and makes 8 pieces.
Nothing to this recipe- Take one sheet of puff pastry and roll it slightly thinner. Spread 1/2 cup of guava paste that is at room temp evenly and roll it up lengthwise on both sides like you would do for palmiers. Cut them into 1/2 inch thick hearts and place them all cut side down on ungreased baking sheet. Bake them at 400 F for 15-20 minutes until crisp and golden.
My guava paste was nowhere near spreadable at room temp. so I had to nuke it for like 15 seconds. I should have done this before starting off with the pastry 'coz the paste was still warm while I spread it. So the pastry started to soften a little but a little freezer time did the trick. The picture here hides several flaws 'coz the paste sort of bubbles on the underside making it a little messy looking. But they look beautiful here, don't they? Sort of like bleeding hearts...
The magic of fenugreek
Today as I was munching on some chicken tikka masala, I noticed that cutting through the richness of the cream based sauce was the flavor- subtle yet obvious- of dried fenugreek. Kasoori methi as it is called in India, is something that you may not have used at home but definitely it is something that is used in many dishes at Indian restaurants. I highly recommend owning a bag of it and using a tablespoon or so to pep up any Indian savory dish or consider kneading it into naan dough.
Fenugreek leaves come from the same plant that bears the fenugreek seeds, another less used ingredient in the West. Both of these ingredients have medicinal virtues such as reducing blood sugar, lowering bad cholesterol and improving digestion. But please, using less is desirable in dishes if you want them to be edible. If you use too much, you end up with a bitter tasting mess. More on the herb and seed can be found here.
If you can't wait to try out this stuff, visit an ethnic grocer or an Indian grocer. You will find it most often as Kasoori methi. All you need to do is crumble some into dishes before you turn off your stove.
Monday, May 02, 2005
Rice with the works
We officially celebrated baby's birthday last saturday and have lots of food left-over. I have so much dal left-over that its taking up an entire rack in the fridge and thats not a good thing. Dal, I feel can never be the star of any dinner since its so common and boring. All the people, who think dal is a comfort food, try eating it 3 days in a row! So to put the dal in the background of our food menu today, here is the star- ***drum roll***- the baked biryani a.k.a handi biryani. This is a time-consuming dish with many parts. But it is tasty and worth the effort. It makes enough to serve six generously. So now I have to think about the left-overs from today but thats another show altogether...
Rice 1 1/2 cups
Onions 4 medium sized
Ginger 1 inch piece
Garlic 7-8 cloves
Green Chillies 4-5
Tomatoes- 2 medium sized
Carrot- 1 medium sized
Cauliflower- 1/4 of a medium one
Green Beans -10-15
Peas -1/2 cup
Fresh Coriander Leaves - a few sprigs
Fresh Mint Leaves- a few sprigs
Saffron - a few strings
rose Water- a few drops (optional)
for flavoring rice:
Green Cardamoms- 2-3
Black Cardamom- 1
Cloves- 2-3
Cinnamon Stick - 1 inch stick
Bay Leaf - 1
For the spice paste:
Oil 2 + for frying tbsps
Caraway Seeds (shahi Jeera) - 1/2 tsp
Cumin Seeds - 1/2 tsp
Coriander Powder - 1 tbsp
Turmeric Powder- 1 tsp
Red Chilli Powder- 1 tsp
Yogurt- 1/2 cup
Salt to taste
Garam Masala Powder- 1/2 tsp
Butter 3 tbsps
Prep work:
1.Wash and soak rice in sufficient water for about 20min.Drain.
2. Peel and chop one onion finely, slice the others.Peel ginger-n-garlic.Remove stems & wash green chillies. Grind ginger,garlic,green chillies to fine paste.
3.Chop tomatoes finely.Peel,wash,cut carrot into ½ inch sized pieces. Separate cauliflower into small florets,wash & drain.String,wash,cut green beans into ½ inch sized pieces.Wash,drain green peas.
4.Clean,wash,chop coriander leaves & mint leaves separately.Soak saffron in rose water or a little warm milk.
Cooking:
5. Boil drained rice in 4 cups of salted boiling water with green cardamoms,black cardamom,cloves,cinnamon & bay leaf,until rice is al dente (don't cook until soft like usual).Drain excess water, if there is any left, & keep aside. I like to color the rice with red and yellow food coloring and mixing slightly to give a marbled effect. But this is optional.
6.Mix all the veg & boil in 3 cups of salted water till 3/4 done. Drain & refresh under running water.Keep aside.
7.Heat an inch of oil in a pan & deep-fry the sliced onions till golden brown.Drain onto an absorbent paper & keep aside.
8.Heat 2 tbsp of oil in a thick-bottomed pan.Add caraway seeds & cumin seeds.When they begin to change colour,add chopped onions & sauté until golden brown.Add ginger,garlic,green chillies paste.Add coriander powder, garam masala, turmeric and red chilli powder, yogurt & mix well.Add chopped tomatoes & cook on a med. heat for about 5 minutes. This requires stirring constantly 'coz if your yogurt is low-fat, it might curdle if it is not stirred. Add boiled veg & salt mix well.
Assembling:
9.Preheat oven to 350 F.
10.Take a casserole dish,arrange alternate layers of cooked veg & rice.Sprinkle saffron dissolved in rose water or milk, coriander leaves,mint leaves,golden fried sliced onions & butter in betweeen the layers & on top.Make sure that you end with the rice layer topped with saffron & spices.
11.Cover & seal with aluminum foil. Cook in the preheated oven,for 10 min.at 350 F.Reduce temp to 300 F & cook for another 10 min.
12.Serve hot with a raita of your choice.
I am a chickenitarian (vegetarian eating chicken sometimes) but don't cook it at home. So if you insist, here is chicken biryani from Sanjeev Kapoor, my favorite chef for authentic Indian recipes. You have to browse through the menu for rice dishes and you will find the biryani there.
Rice 1 1/2 cups
Onions 4 medium sized
Ginger 1 inch piece
Garlic 7-8 cloves
Green Chillies 4-5
Tomatoes- 2 medium sized
Carrot- 1 medium sized
Cauliflower- 1/4 of a medium one
Green Beans -10-15
Peas -1/2 cup
Fresh Coriander Leaves - a few sprigs
Fresh Mint Leaves- a few sprigs
Saffron - a few strings
rose Water- a few drops (optional)
for flavoring rice:
Green Cardamoms- 2-3
Black Cardamom- 1
Cloves- 2-3
Cinnamon Stick - 1 inch stick
Bay Leaf - 1
For the spice paste:
Oil 2 + for frying tbsps
Caraway Seeds (shahi Jeera) - 1/2 tsp
Cumin Seeds - 1/2 tsp
Coriander Powder - 1 tbsp
Turmeric Powder- 1 tsp
Red Chilli Powder- 1 tsp
Yogurt- 1/2 cup
Salt to taste
Garam Masala Powder- 1/2 tsp
Butter 3 tbsps
Prep work:
1.Wash and soak rice in sufficient water for about 20min.Drain.
2. Peel and chop one onion finely, slice the others.Peel ginger-n-garlic.Remove stems & wash green chillies. Grind ginger,garlic,green chillies to fine paste.
3.Chop tomatoes finely.Peel,wash,cut carrot into ½ inch sized pieces. Separate cauliflower into small florets,wash & drain.String,wash,cut green beans into ½ inch sized pieces.Wash,drain green peas.
4.Clean,wash,chop coriander leaves & mint leaves separately.Soak saffron in rose water or a little warm milk.
Cooking:
5. Boil drained rice in 4 cups of salted boiling water with green cardamoms,black cardamom,cloves,cinnamon & bay leaf,until rice is al dente (don't cook until soft like usual).Drain excess water, if there is any left, & keep aside. I like to color the rice with red and yellow food coloring and mixing slightly to give a marbled effect. But this is optional.
6.Mix all the veg & boil in 3 cups of salted water till 3/4 done. Drain & refresh under running water.Keep aside.
7.Heat an inch of oil in a pan & deep-fry the sliced onions till golden brown.Drain onto an absorbent paper & keep aside.
8.Heat 2 tbsp of oil in a thick-bottomed pan.Add caraway seeds & cumin seeds.When they begin to change colour,add chopped onions & sauté until golden brown.Add ginger,garlic,green chillies paste.Add coriander powder, garam masala, turmeric and red chilli powder, yogurt & mix well.Add chopped tomatoes & cook on a med. heat for about 5 minutes. This requires stirring constantly 'coz if your yogurt is low-fat, it might curdle if it is not stirred. Add boiled veg & salt mix well.
Assembling:
9.Preheat oven to 350 F.
10.Take a casserole dish,arrange alternate layers of cooked veg & rice.Sprinkle saffron dissolved in rose water or milk, coriander leaves,mint leaves,golden fried sliced onions & butter in betweeen the layers & on top.Make sure that you end with the rice layer topped with saffron & spices.
11.Cover & seal with aluminum foil. Cook in the preheated oven,for 10 min.at 350 F.Reduce temp to 300 F & cook for another 10 min.
12.Serve hot with a raita of your choice.
I am a chickenitarian (vegetarian eating chicken sometimes) but don't cook it at home. So if you insist, here is chicken biryani from Sanjeev Kapoor, my favorite chef for authentic Indian recipes. You have to browse through the menu for rice dishes and you will find the biryani there.
Sunday, May 01, 2005
Making paneer
Paneer is such a versatile ingredient to have on hand. I usually rely on the store-bought kind, since an indian grocery store is like two minutes away from my apartment. However, I had a fast dying container of 1% milk and the wastage police were behind me already... This is really a method and no specific amounts can be given. All the recipes that call for specific amounts of the acidic component have failed me. So here you go with approximate quantities:
Heat 4 cups of milk almost to the boiling point. You should see small bubbles around the container. Now add the acidic component- start with 2 tablespoon of lemon juice or 1 Tablespoon of the common vinegar. Stir. If the curdling begins already, stop stirring and continue heating for a minute more (without stirring) until all the curds have separated from the whey. If you don't see any separation, add another tablespoon of the curdling agent and stir to mix.
Off the record, I usually need about 1/4 cup of lemon juice to curdle 4 cups of milk. Vinegar is more powerful and 2 tablespoons of it may suffice. But vinegar gives its odor to the paneer. So you will be better off with lemon juice.
Now that the curds have separated, switch off your stove and add 1/4 cup of cold tap water. This is supposed to strengthen the cheese (or so I heard. Very important if you want to use paneer in bengali sweet delicacies). Place a double layer cheese-cloth on a strainer and pour the entire shebang into it. I save the liquid for cooking rice or pasta or for making bread softer. It contains a lot of nutrients and protein. Although it has an aroma of the curdling agent, it seems to melt into cooked dishes.
Make a bundle out of the cheesecloth and tie it to a faucet or hang it somewhere for 20 minutes until most of the liquid drips off. Press now and then to accelerate the process. Now place the cheesecloth clad paneer in a plate covered with paper towels. Place a heavy baking sheet on top and place several heavy cans over the baking sheet to press the paneer into a square or almost. Let this sit for 1 hour and then undress the paneer gently. Place the naked paneer in an airtight container or ziploc and refrigerate.
Update: This yielded 1 cup worth of paneer. Not much, but I have kept this in the freezer in a freezer-safe ziploc. I am sort of becoming a freezer queen, I know...
Subscribe to:
Posts (Atom)