Tuesday, July 05, 2005

Kerala style preserved lemon pickle


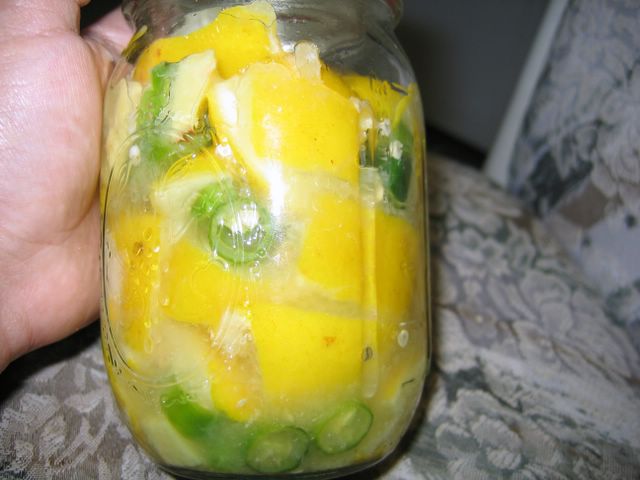
It is called Neer elumichangai or lemon preserved in water. True to its name, the lemons are soaked in an acidic liquid which is mainly composed of lemon juice, salt and a little water. There is no oil which differentiates it from the normal, spicy Indian pickles that are preserved in oil. My grandmother used to send us jars of spicy pickles every summer. This 'pickle' would be made just for me. My mom still makes this for me as a special request. Since I will not be going to India for a while, I have to venture into the making of these lemons.

This pickle is consumed mainly when you are feeling nauseous or having a stomach bug. People who visit hilly areas carry this and when they feel a wave of nausea, quickly chew on the lemon skins to combat it. For me this is a sort of comfort food when teamed with yogurt rice. Of course, you can use the lemon skins for couscous, tagine or any dish that calls for preserved lemons. I also use the liquid with a little olive oil on mesclun greens.

Keralan preserved lemon pickles

3 large lemons (washed and scrubbed well)
1/2 tsp turmeric (optional)
4 serrano chiles or jalapenos, coarsely minced
2 cm fresh ginger, peeled and thinly chopped
salt to taste

Bring about 2 qts of water to a boil. Add turmeric and whole lemons. Cook for 10 min. Remove lemons from water and let them cool.

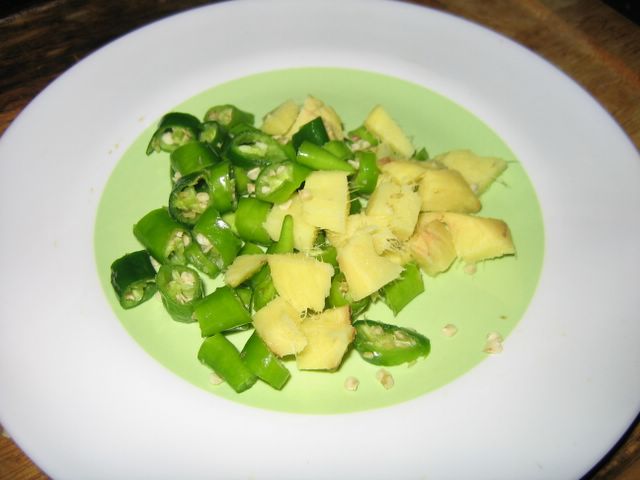
Mix the chilies and ginger in a bowl. Over another bowl, chop the lemons into quarters, holding them with the palm of your hand. Do not do this on a board because you will lose the juices that come out of the lemons. When you are cutting, look for seeds and remove them. Place the cut up lemons and their juices in the same bowl.


Add the ginger and chilies to the lemon-lemon juice mixture. Add 2 tsp salt or more as required. Mix well. Store in glass jars. When you are pouring them into the jars, push the lemons, chilies and ginger inside such that they get compressed in the juice. There should be a layer of liquid on top. If the liquid does not come to the top, top the jar off with some water. Keep refrigerated. You can use this after a week or so. This will keep forever refrigerated.

Saturday, July 02, 2005

Ricotta gnocchi


I always greedily buy the huge container of ricotta cheese that Sam's club sells and try to use it up. Usually I end up throwing about half of it. I came across a recipe for ricotta gnocchi and knew that this was probably the only way of using up the cheese. My previous attempt at making potato gnocchi was horrible and I ended up with pebbles that were tasteless.

Knowing that ricotta gnocchi was the most temperamental type, I gave it a go. I also did not heed the advice from chefs to use them FRESH. I froze them all and used them today almost a week later. The result was unbelievably tasty and soft like a pillow. One thing I learned was making gnocchi is intuitive and the flour proportion stated in a recipe may be misleading. The dough for this is very sticky but resist the urge to add flour. I have adapted Mario Batali's recipe.

32 oz can of ricotta cheese (drain water by placing it in a strainer)
1 egg
2-3 T grated parmesan
1 tsp salt or to taste
Pepper
1 tsp dried parsley or basil
1/2 a nutmeg, ground
1 cup flour (more or less as required)

Place the ricotta in a fine sieve over a bowl. Cover with plastic wrap and refrigerate for at least 8 hours, or overnight. In a medium-sized bowl, stir the drained ricotta, 1 cup of the flour, the egg, parsley/basil, parmesan, salt, pepper and nutmeg together gently but thoroughly until a soft dough forms, adding a little more of the flour if the dough is sticky when poked.

Forming the gnocchi: dip 2 tablespoons in cool water. Using 1 spoon, scoop up a heaping tablespoon of the ricotta mixture and use the other spoon to form it into a smooth, pointed oval. I rolled the mixture using wet hands that were slightly floured. A messy job! Place finished gnocchis on a well-floured plate. Refrigerate them until firm and use. Or freeze.

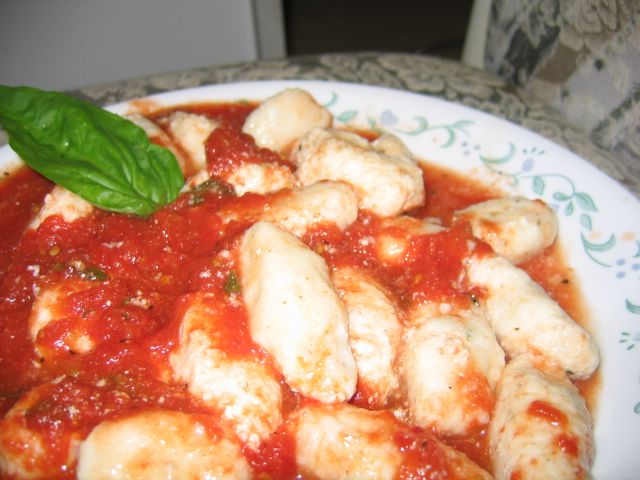
I served the gnocchis with a simple marinara sauce. I just wish the gnocchi gods are just as favorable next time around.

Friday, July 01, 2005

Strawberry bruschetta


Though it sounds weird, it is a pretty interesting thing to try. I really cannot bear the thought of eating strawberries on their own but I like them in baked, scrumptious desserts. When Giada De Laurentis made this recipe in Everyday Italian, it looked good enough for me to give this a shot. I made it as a sort of a healthful dessert last night. It tastes great with the sweetened up strawberries shedding their juices into the crusty bread. You can imagine how tasty they would be on a slice of brioche or pound cake.

Strawberry Bruschetta

2 slices (1/2-inch-thick) rustic white bread
2 tablespoons unsalted butter
5-6 strawberries, sliced
4 teaspoons sugar

Spread the butter over the bread. Arrange the sliced strawberries over them. Sprinkle the strawberries with the sugar. Broil until the sugar begins to caramelize, about 2 minutes and bread is toasty.